Assembly Instruction
Assembly Instruction for DIY kit
Unscrew top four M2.5 bolts
Spread enclosed thermal grease to the cpu and ram pads. Spread it to be around 0.3mm thickness.
Place your RPI to the camera side case. Side connectors should be fitted to the position first.
Lift camera connector holder on RPi and insert the camera cable into it. Than lock the connector holder by gently pushing it. If the cable is short, pull it very carefully so that the FPC is not damaged.
Place the cover case to the RPi4 and press slightly.
Open the top cover again and see if the thermal grease is properly spreaded on the CPU and RAM.
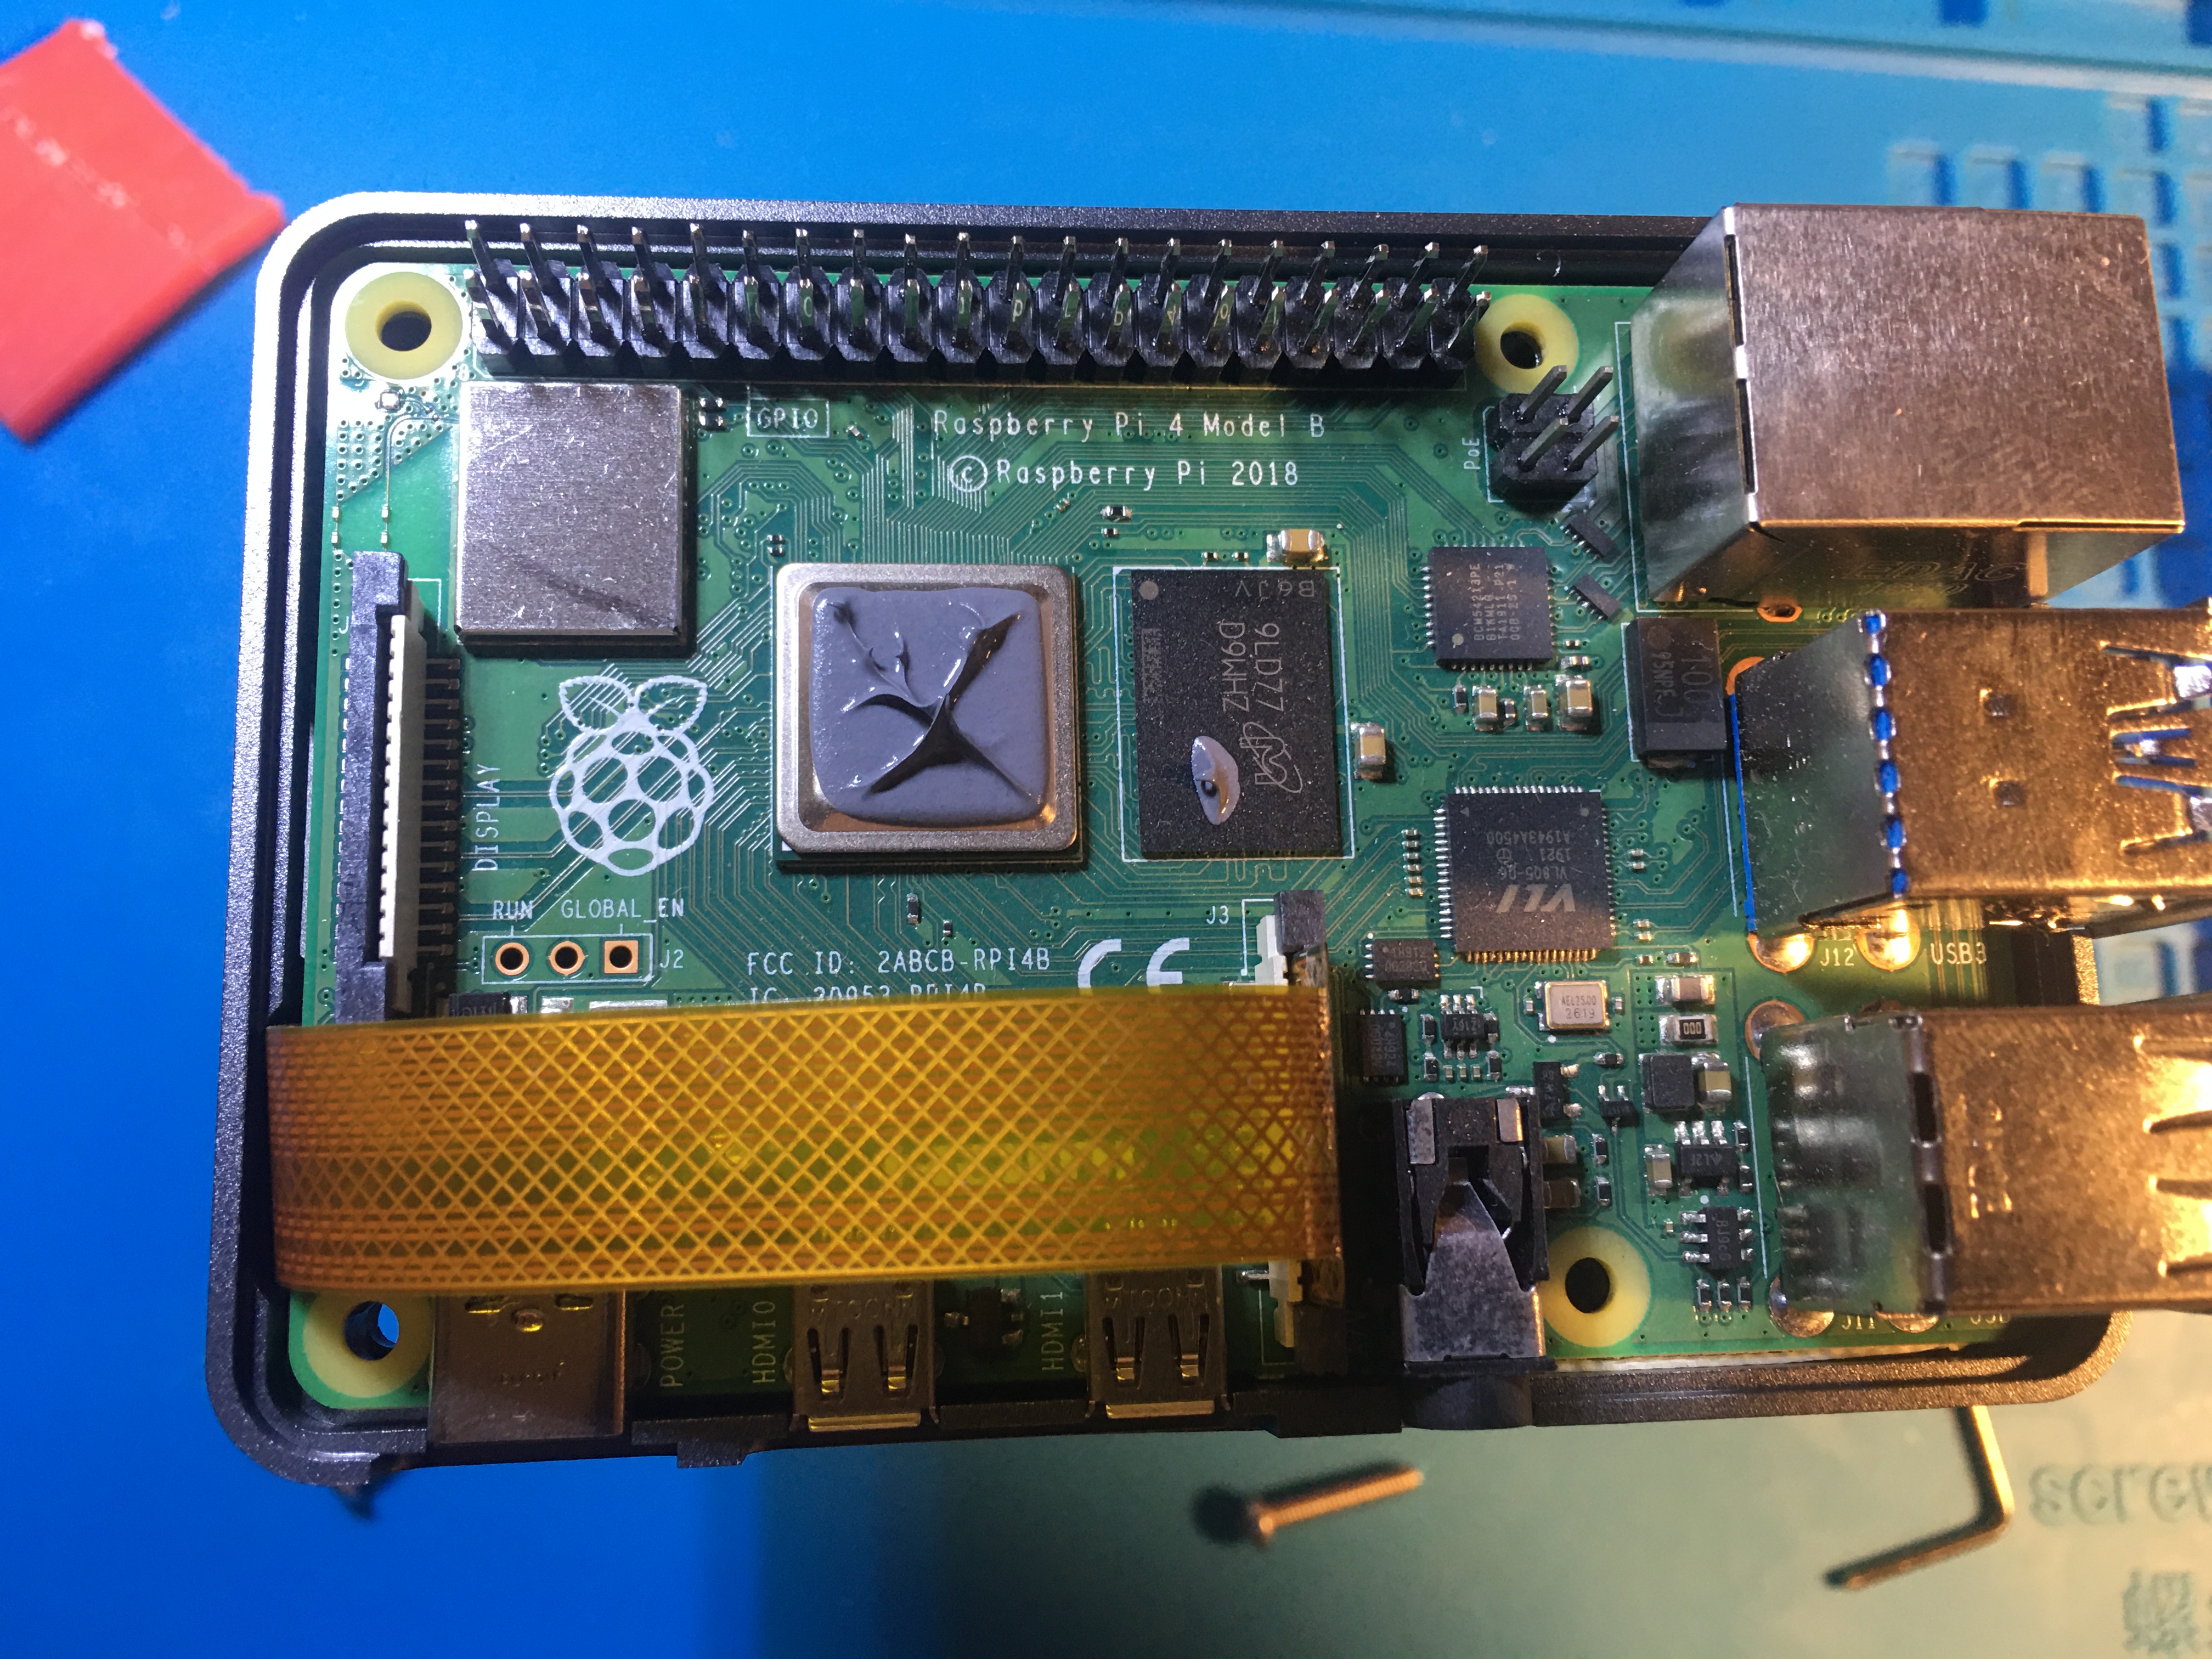
Failure case. The thermal grease was not enough on the ram pad.
Close both cover and tightnen four M2.5 bolts. Don’t tighten it too much as cover will be clamping the RPi board.
Important
You must use ESD removing tools such as ESD Grounding Wrist Strap. The camera module is not ESD protected. It is very easy to damage the camera board if you do not handle ESD properly. DynamicDeepSKY is not responsorble for any damage caused by ESD. Every DIY kits are tested before shipped. If the camera does not work or sending a broken images, you have to purchase the camera PCB board again.
See the assembly video tutorial for more detailed instruction of above: https://youtu.be/C3kBiqK5P64
It is highly recommanded to watch the video before you start.
Once assembled, connect Astroid to a USB power source with 5V 3A capacity and see if it boots up normally.
Setting Up Your License and Serial
Once you confirmed Astroid is normaly working, you need to put your license and serial. Your serial number on the left side of Astroid.
License setting
Download your system ID by clicking GetSysID button under System Setting menu
Send it to us and we will send your license code back to you. We will normally get back to you within 12 hours.
Once you got your license key, copy and past the code to the LicenseCode under System Setting menu and click AddLicense button. If you have multiple license keys repeat this multiple time.
Refresh the screen by hitting F5 and open the system information window to see if the license is activated. Check ShowInfo box under System Setting menu to open up system information window. Any app name should appear on the Licenses if it was correctly added.
Serial setting
Check your serial number from the side sticker and type astroid.local/setserial/YOUR_SERIALNUMBER on your web browser
Refrash the screen on your web browser and check if the serial number is correct.