eFinder
Clicking the eye button  on the downside icon bar will swith Astroid’s operation mode to eFinder and activate live sky recognition. Before you use eFinder, make sure the sky is recognized. The red eye icon
  on the status bar will turn into the green eye
  when the sky is recognized.
Important
Note that the sky recognition mode only works with the provided 5mm lens. You can mount other lenses to use Astroid as a camera but the sky recognition would not work.
Sky Recognition
When the sky recognition is activated, Astroid will try to recognize the sky but it might fail in some cases. If the sky recognition status icon does not turn to green in 5 seconds try the following.
Check if the lens focus is correct. With the blurry focus, Astroid does not recognize stars well.
Make sure there are enough stars in the image.
Adjust the gain/exposure a bit higher or lower. The image should not too bright or dark. Note that adjusting exposure to higher slows down the response speed.
Point the camera to a direction where no cloud, moon, the building exists. Usually, it takes more time to recognize the sky when there are obstacles in the view. Once it is recognized slowly move the camera in the desired direction.
Light Pollution
One of the dominant factors that affect sky recognition performance is the sky condition. The best sky condition would be a very dark sky under Bortle 6 without the moonlight. Bortle is a metric to estimate the amount of light pollution in the night sky. You can easily see the Bortle level of your place from the following site.
https://www.lightpollutionmap.info/
The following example shows the Bortle level of three different places around Brisbane city.
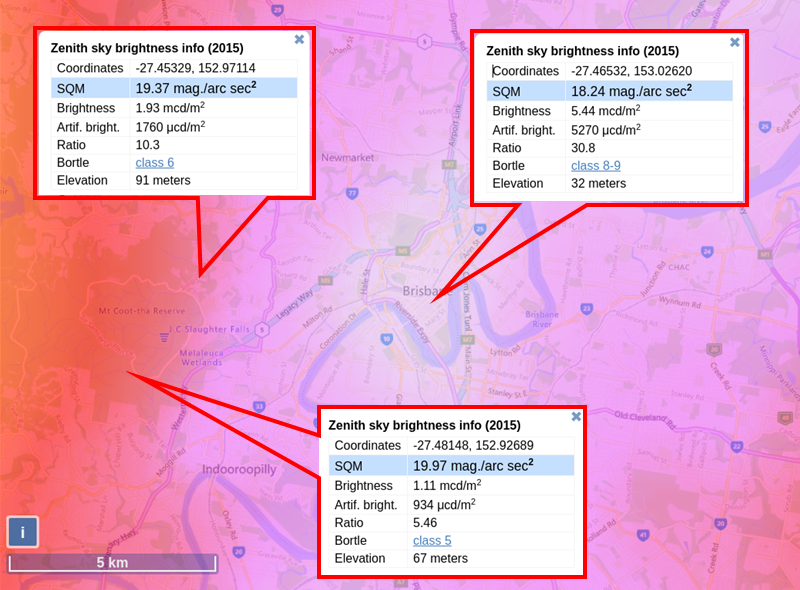
Although it might work, the sky recognition performance is not guaranteed around the high light pollution area above Bortle 6. Refers to the following table for the details of Bortle class.
Sky Condition |
Bortle Class |
|---|---|
Excellent dark sky |
1 |
Average dark sky |
2 |
Rural sky |
3 |
Rural/Suburban transition |
4 |
Suburban |
5 |
Bright suburban |
6 |
Suburban/urban transition |
7 |
City sky |
8 |
Inner city sky |
9 |
Sky Recognition with Moon Light or Light Pollution
Although it is recommended to be used under Bortle 6 and without the moonlight, if you can’t avoid such an environment there is a trick that you can do to make eFinder works but with limited speed and accuracy.
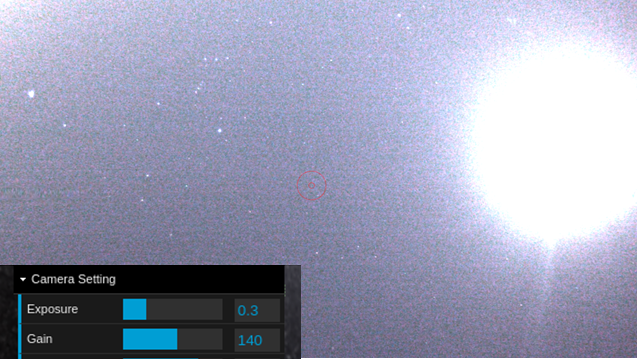
The default setting of sky recognition is 0.3 sec for the exposure and 140 for the gain which is optimized for Bortle 5 without the moonlight. The low exposure helps to increase response speed but needs a high gain setup which results in a noisy image under light pollution and the moonlight condition. Noisy image decreases the sky recognition performance.
A simple solution is compromising the response speed by increasing exposure and lowering the gain. The following example shows how the exposure and the gain setup reduces noise moonlight conditions.

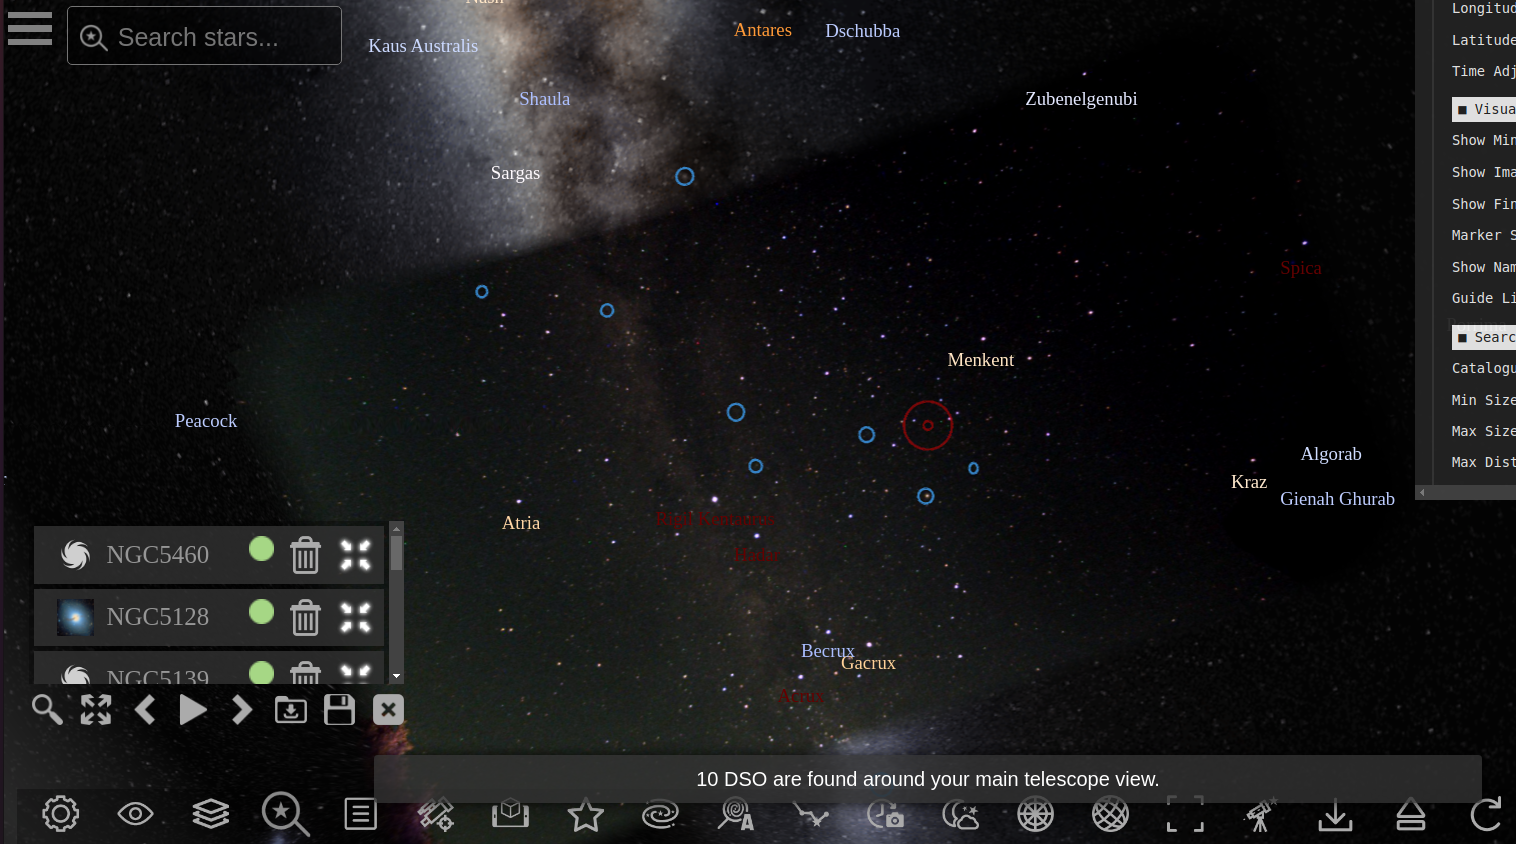
Automatic DSO search 
Automatic DSO search is very useful when you would like to run a free-style sky exploration without any preparation. Enabling this will automatically find the nearest DSO to the current main telescope’s view and display its shape and id on the screen.
By default, this feature will show sky objects in NGC, but you can select another catalog under “Astro Tools Menu”->”Search Setting”. Also, you might don’t want to find too small or too large stars according to your eyepiece’s field of view. Adjust Min and Max size options.
If you don’t see anything on the screen after turning on this option, try to zoom in a little bit and move around different parts of the sky.
Geolocation and Time
System time is automatically updated according to your device’s time but you have to put longitude and lattitude information manually. Initially, these are set to 0 and you will see the red GPS icon on the top status icon location. Time and GPS information are important to properly draw the predicted sky.
Marker
As soon as you activate eFinder mode you will see a red mark on the image. The center of the red circle is where your main telescope is looking at. If it is the first time to use this feature with your telescope, you might need to move this marker to make it aligned with your telescope’s view. Refers to eFinder Align for the detailed procedure.
Time Adjust
By default, the planetarium will show you the current sky. But you can draw the past and future sky by adjusting the time bar. The supported range is -10 to +10 hours to the current time.
Star Finder 
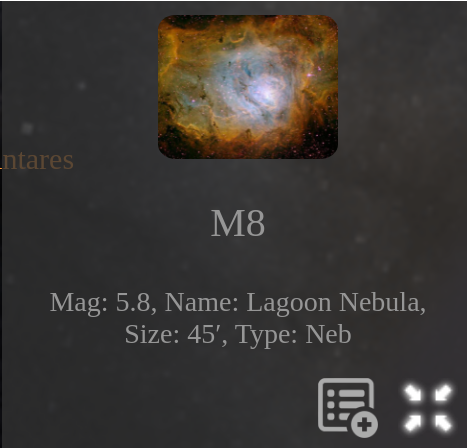
Astroid has built-in NGC, IC, M, HIP star lists. To use the star finder, find the number of the star object that you are interested in and enter it to the search bar. It will show you its photo and other information as well.
Once you clicked a star on the star finder list, Astroid will display the location of the target and how many degrees you should rotate along the left/right and up/down direction. Adjust your mount according to this angle. Currently, the EQ mount guideline is not supported but this feature will be added in the future update.
AR Mode 
As a default, when you drag the screen it will always move around AzAlt direction. But sometimes it is convenient to fix the screen view to the camera view and move the world instead. Enable the CameraView option in the setting menu, if you would like to enable this feature.
Click and Find
One of the most unique feature of Astroid is that you can click and find the star and DSO infromation from the camera’s image. Combined with EAA stacker, Astroid provides visually interective way to explorer the night sky rather than just selecting a star on a list.
Camera Lock and Unlock 
User interface automatically follows center of the camera image by default. If you would like to unlock the automatic camera follow mode, simply click the lock button on the left side .
Clicking the button one more time will switch it back to the lock mode and follow the camera.
Star List 
You can make your own star list by clicking add button  in the star finder window.
The added stars can be seen on the star list window. Click to open the star list window.
Also, you can automatically search the nearby DSO to your current telescope and add it to the list by clicking  icon.
icon.
Search nearby DSO. By default M is used but you can change it to NGC, IC in the Astro tools menu.
To save and load the star list use the following icons.
 Save list. The list is stored on Astroid’s internal memory.
 Load list.